1. Login with your Email id and Password.
2. On a CloudFlare dashboard, click on website and select your active website.

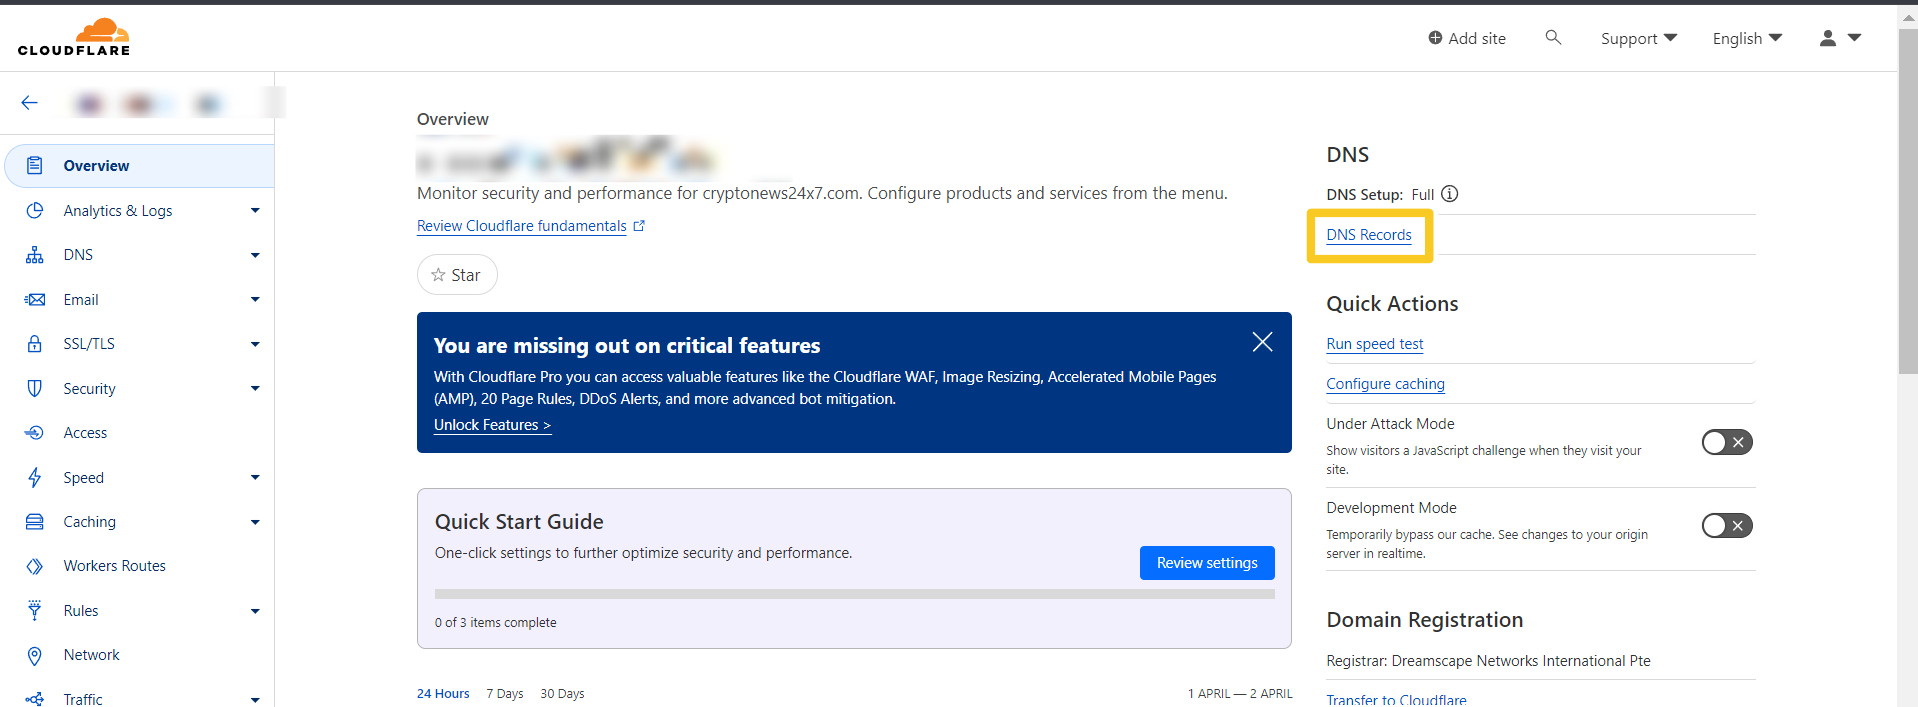
3. Click on DNS records.
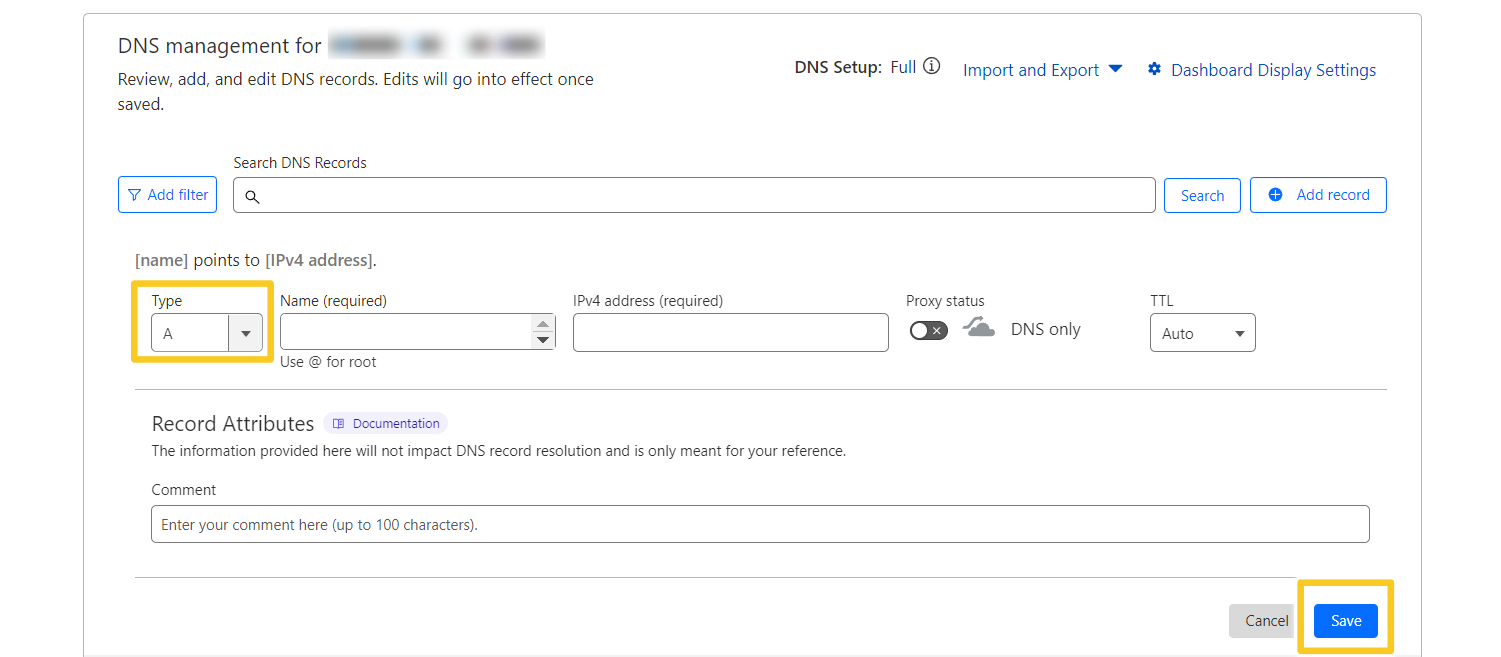
4. In DNS records, click on Add records.

5. Select type and click on “A type” fill the details like name, ipv4 address. Then, click on save button.
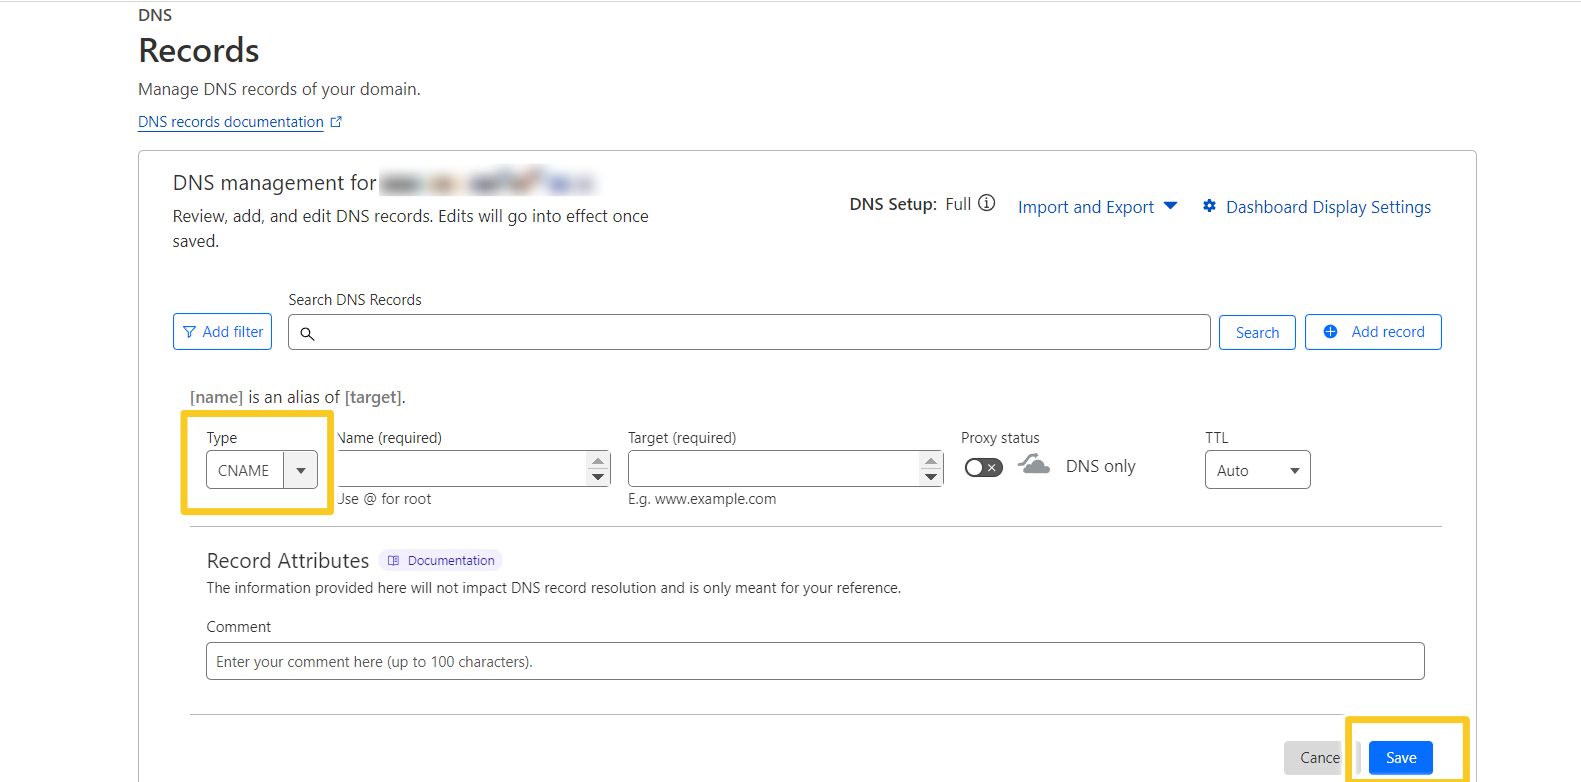
- Select type and click on “CNAME” fill the details like name, target. Then, click on save button.
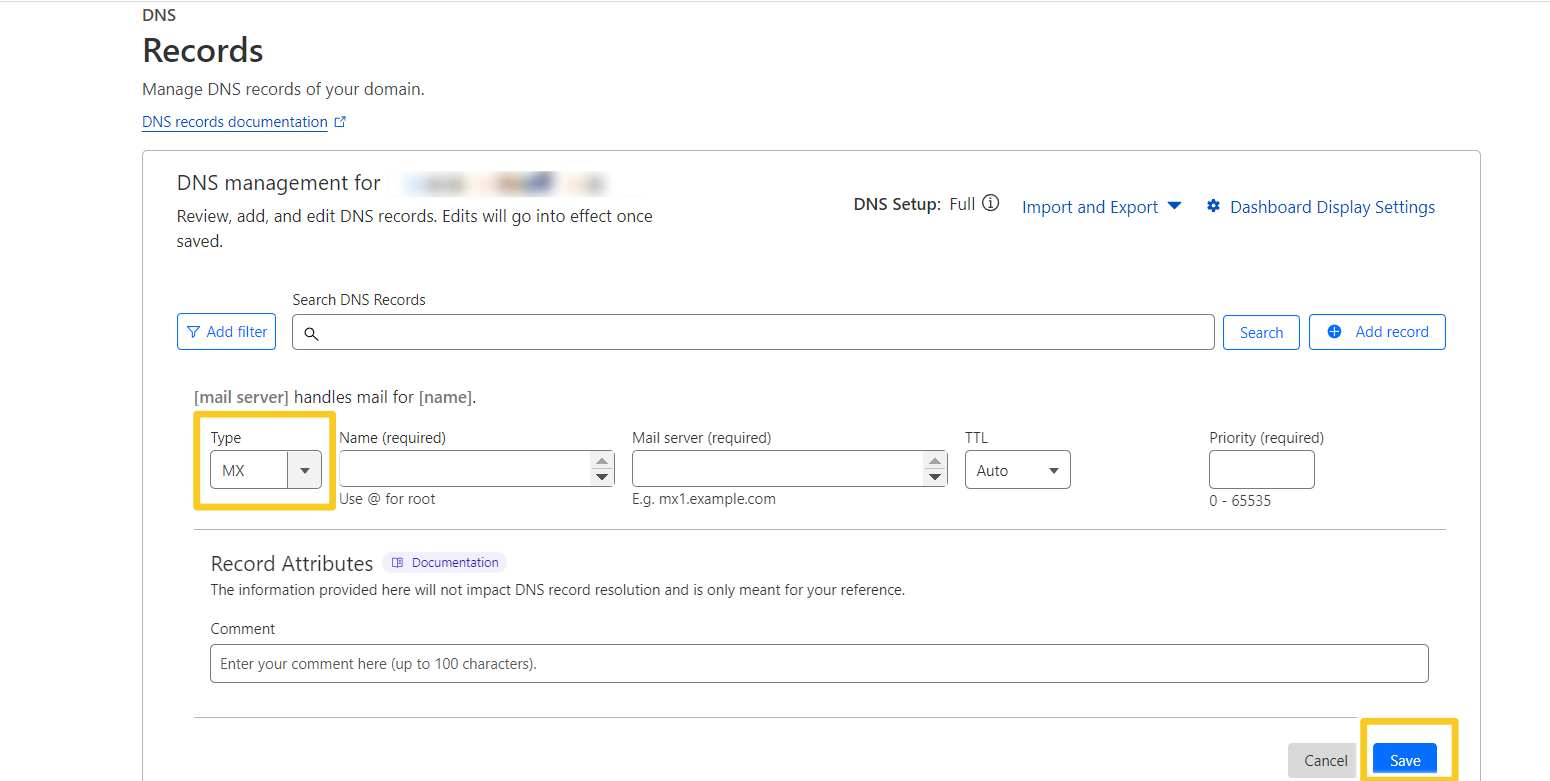
- Select type and click on “MX” fill the details like name, mail server, priority. Then, click on save button.
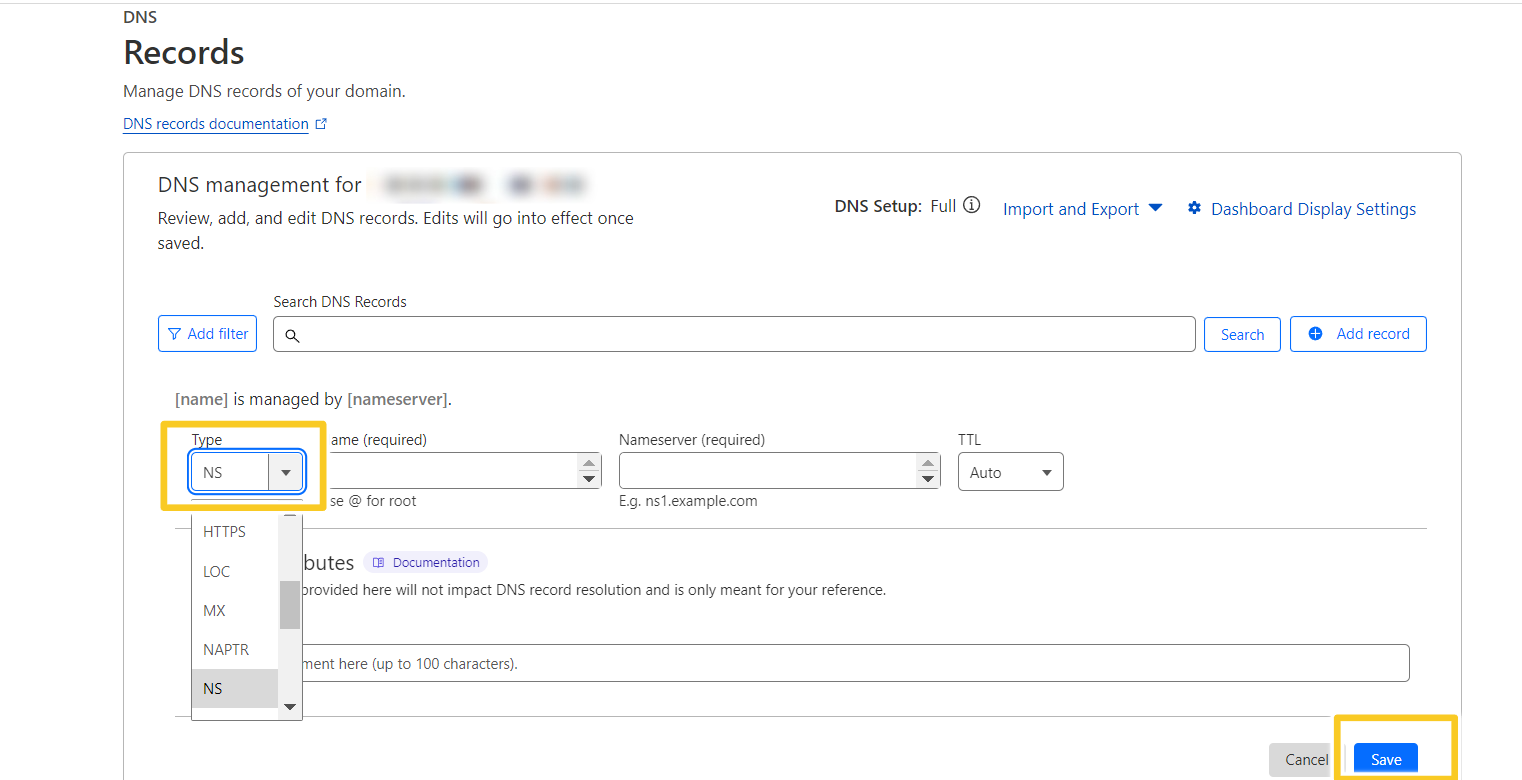
- Select type and click on “NS” fill the details like name, name server. Then, click on save button.
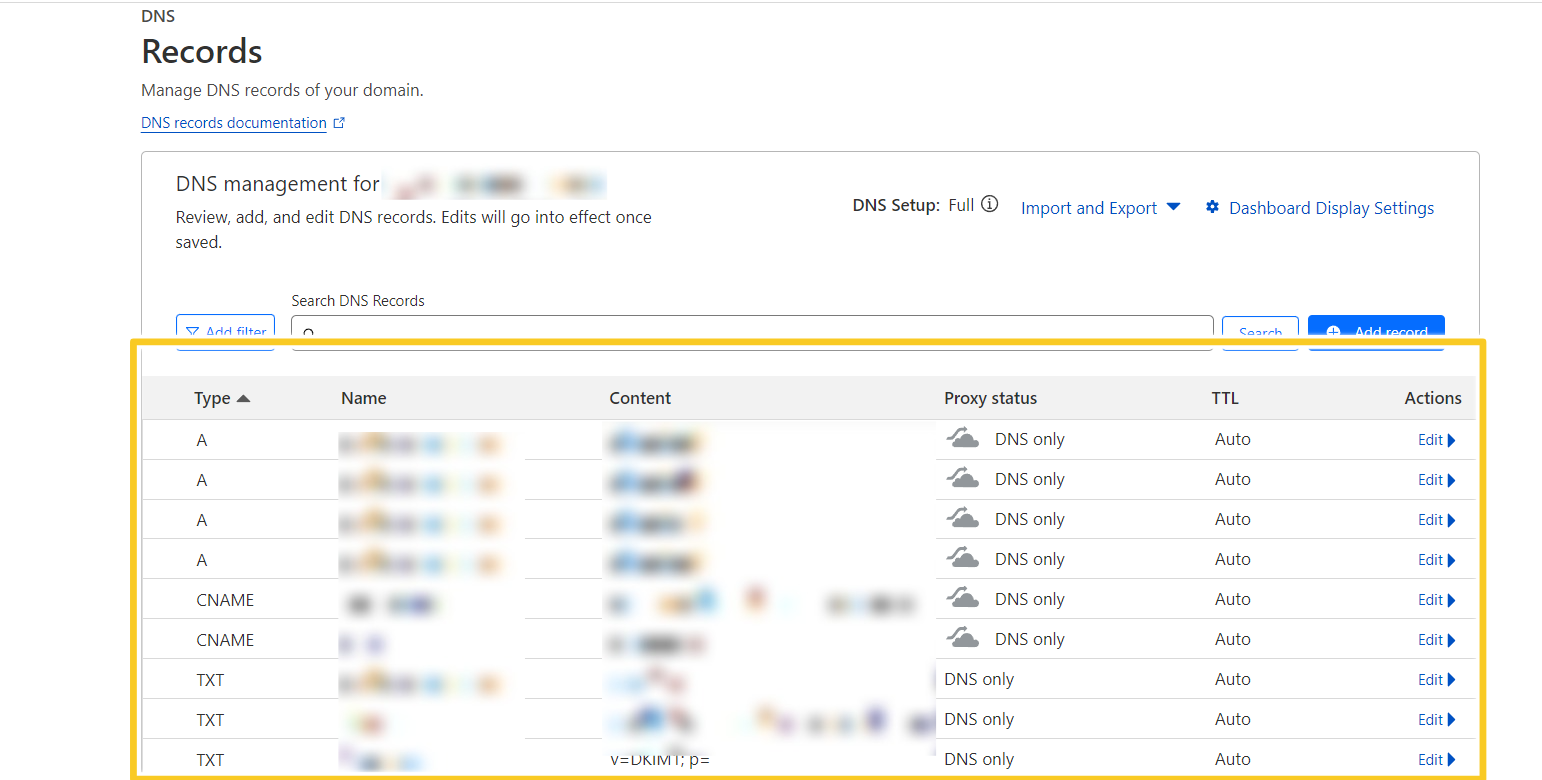
6. You will able to view all the detail of DNS records here.
